PyTorch3D Rendering Guide
Differentiable meshes, cameras and renderers on tensors, so 3D predictions learn from 2D pictures through gradients.
Why Does This Exist?
Many 3D labels are missing while 2D pictures are plentiful. Differentiable rendering closes the gap: predict a mesh, render it from a known camera, compare against the photo, and let gradients fix the shape. PyTorch3D supplies the tensor pieces: meshes, cameras, lights, rasterizers and shaders that all carry gradients. It grounds differentiable rendering beside meshes and point cloud processing.
This page covers the render contract, one projection fixture, and appropriate use.
Think of It Like This
A shadow puppet stage with elastic figures
Cutouts stand between lamp and screen. Moving a puppet moves its shadow, and a director who wants a taller shadow stretches the puppet, not the screen.
PyTorch3D is that stage with stretchable puppets. The camera is the lamp geometry, the render is the shadow, and gradients are the director's hands. The analogy stops at light: real shadows carry no texture, while renders shade every covered pixel.
How It Actually Works
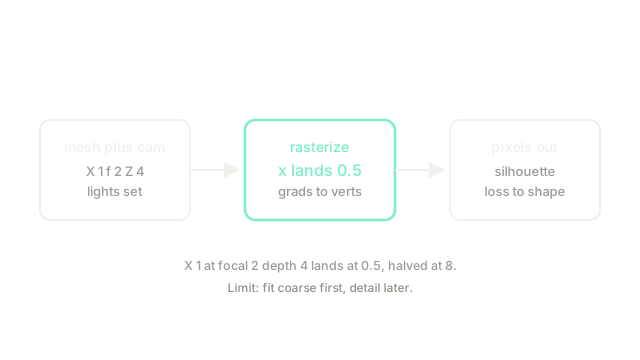
Input is a batched mesh plus camera and lights. Output is rendered pixels: silhouette, depth, color or normals, each differentiable back to vertices. Purpose is shape supervision from 2D views without 3D labels. Appropriate use is mesh fitting, pose refinement and analysis-by-synthesis at modest batch sizes. Keep batches small and resolutions low early: raster cost grows with pixels times faces.
Projection fixture
Take pinhole with , , . Then . Doubling depth to halves it to . The diagram marks 0.5 on the image line, the exact spot the rasterizer shades.
Code
Projection in plain Python:
def project(x: float, f: float, z: float) -> float: return f * x / z # pinhole divide
print(project(1.0, 2.0, 4.0)) # -> 0.5print(project(1.0, 2.0, 8.0)) # -> 0.25Depth 4 lands at 0.5, depth 8 at 0.25.
Watch Out For
Rendering at full resolution before the shape is close
Fine pixels on a wrong mesh give sharp, confident, useless gradients. The symptom is a fit that locks onto a shifted silhouette early. Fix it by fitting coarse to fine: low resolution and blur first, full detail only after alignment.
The Quick Version
- PyTorch3D maps meshes plus cameras to rendered pixels with gradients to vertices.
- X 1 at focal 2 and depth 4 projects exactly to 0.5.
- Doubling depth halves the image position to 0.25.
- Use it for mesh fitting and 2D-supervised 3D learning.
- Fit coarse to fine, never full resolution first.