Image Editing and Inpainting
Instead of generating an entirely new image from scratch, inpainting lets you erase a specific part of a photo (like a coffee cup) and ask the AI to generate something else in its place (like a vase) without touching the rest of the image.
Why Does This Exist?
In the early days of generative AI, if you prompted "A cat sitting on a red sofa" and the AI generated a perfect image except the sofa was blue, you had a problem. If you changed your prompt to "A cat sitting on a red sofa," the AI would generate a completely different cat in a completely different room. You couldn't just "fix" the sofa.
Inpainting solves this by allowing users to edit localized regions of an image. You draw a "mask" over the blue sofa, keep the prompt "A cat sitting on a red sofa," and the AI will perfectly blend a newly generated red sofa into the masked area while leaving the cat and the rest of the room entirely untouched. This capability shifted diffusion models from mere "slot machines" of random art into precise professional tools used in Photoshop and film production.
Think of It Like This
The Art Restorer
Imagine you buy a beautiful, historic painting of a landscape, but there is a massive water stain right in the middle of the sky.
You hire a professional art restorer. The restorer doesn't throw the painting away and paint a new one. They carefully tape over the good parts of the painting so they can't accidentally ruin them (the Mask). Then, they look at the surrounding clouds and colors, and paint over the water stain so perfectly that you can't even tell where the old paint ends and the new paint begins.
Inpainting is exactly this: taping off the good pixels and asking the AI to hallucinate new pixels that seamlessly blend with the edges.
How It Actually Works
The brilliance of inpainting with diffusion models is that it doesn't actually require training a brand-new model from scratch. You can take a standard, pre-trained Stable Diffusion model and force it to inpaint just by changing the math in the inference loop.
1. The Mask
The user provides three things: the original image (), a binary mask () where 1s represent the area to be replaced and 0s represent the area to keep, and a text prompt.
2. The Reverse Process Hack
Recall how a diffusion model generates an image: it starts with pure noise and slowly denoises it step-by-step ().
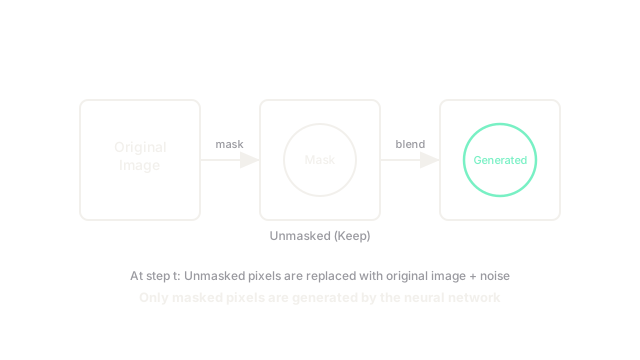
During inpainting, at every single step , we do the following:
- Generate: We ask the neural network to denoise normally, yielding a slightly cleaner image .
- Override: We take the original, real image , and artificially add steps of noise to it using the known forward diffusion formula. Let's call this .
- Blend: We combine them using the mask. For all the pixels we want to keep, we throw away the neural network's prediction and replace them with the artificially noisy original image. For the pixels we want to replace, we keep the neural network's prediction.
3. The Seamless Blend
Because we do this override at every single step from down to , the neural network is forced to denoise the masked region in the context of the surrounding noisy pixels. It "sees" the edges of the real image at every step and naturally blends its generated pixels to match the lighting, texture, and geometry of the unmasked area.
4. Fine-Tuned Inpainting Models
While the "hack" above works decently well, the seams can sometimes look slightly unnatural. To get perfect results, researchers created dedicated Inpainting Models. They take a pre-trained model and fine-tune it by artificially masking out random squares of images during training, passing the mask itself into the neural network as an extra channel. This teaches the model explicitly how to blend edges perfectly.
Code
This pseudocode shows how the blending logic happens inside the inference loop of a basic (non-fine-tuned) inpainting pipeline.
import torch
def inpaint_step(model, x_t, x_0_original, mask, t, alpha_bar_t_minus_1): """ Performs one step of masked inpainting. mask: 1 for pixels to REPLACE, 0 for pixels to KEEP. """ # 1. Ask the neural network to denoise the whole image # (It tries to denoise the masked area AND the kept area) x_t_minus_1_pred = model.denoise_step(x_t, t) # 2. Add the exact right amount of noise to the original, clean image # to match the t-1 noise level noise = torch.randn_like(x_0_original) x_t_minus_1_known = torch.sqrt(alpha_bar_t_minus_1) * x_0_original + \ torch.sqrt(1 - alpha_bar_t_minus_1) * noise # 3. Blend them together! # Where mask is 1 (replace), take the neural network's prediction. # Where mask is 0 (keep), force it back to the known noisy original. x_t_minus_1 = mask * x_t_minus_1_pred + (1 - mask) * x_t_minus_1_known return x_t_minus_1Watch Out For
Outpainting Causes Duplication
Outpainting is just inpainting applied to the outside borders of an image (e.g., expanding a square photo into a widescreen aspect ratio). However, because the model only sees the existing image and the prompt, if you prompt "A man standing in a field" and outpaint the left side, the model will often just generate a second man standing in the field, because the prompt told it to. You must carefully alter your prompt for outpainting to describe only what should exist in the newly expanded area (e.g., "An empty grassy field").
The Quick Version
- Generating an image from scratch is rigid; if you want to change one small detail, changing the prompt generates a completely different image.
- Inpainting solves this by allowing users to mask an area and prompt the AI to generate new content strictly within that mask.
- It works by continuously overriding the unmasked pixels with the original image (plus the appropriate amount of noise) during the reverse diffusion loop.
- Because the neural network constantly sees the surrounding original pixels during denoising, it seamlessly blends the generated area into the original lighting and texture.
- This underlying mechanic is the exact technology powering features like Photoshop's "Generative Fill."