Visual explainer
Gradient Descent
Walk a loss curve from w = 2 to the bottom: read the uphill slope, flip it into a step, and watch out for flat ground.
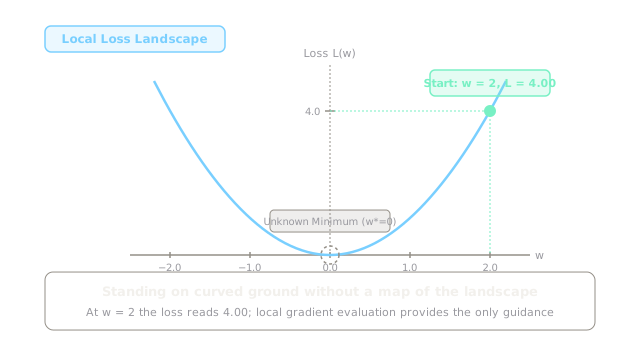
You stand on curved ground with no map. Each spot reports one number, your loss, which reads 4.00 at w = 2. The lowest point hides somewhere nearby, and your feet are your only sensors.
The Uphill Arrow
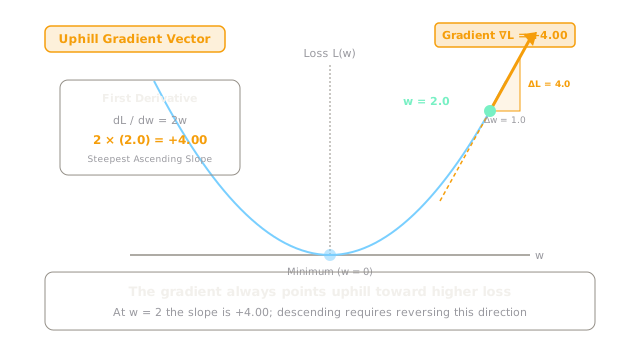
At any spot you can feel the local slope. That arrow, the gradient, always leans uphill toward higher loss. Here it reads 4, steep and unambiguous. It tells you exactly where not to go.
Flip It Downhill
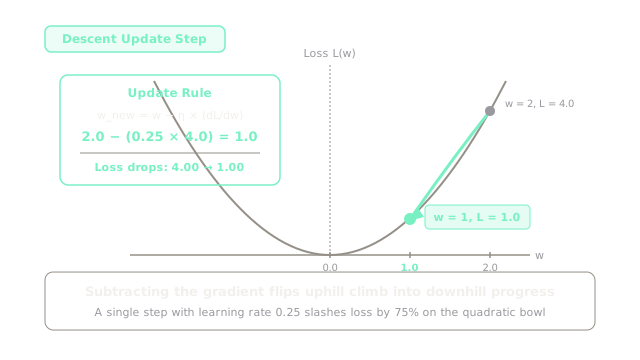
Training flips that arrow. You step against it by eta times the slope: 2 minus 0.25 times 4 lands you at w = 1. One line of arithmetic, and your loss drops from 4.00 to 1.00.
Shrinking Steps
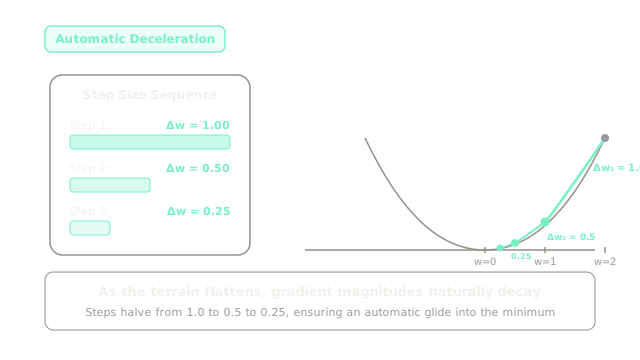
Repeat the recipe and something kind happens. Near the bottom the slope flattens, so each step lands shorter: 1.0, then 0.5, then 0.25. You glide in instead of overshooting it.
Proof It Worked
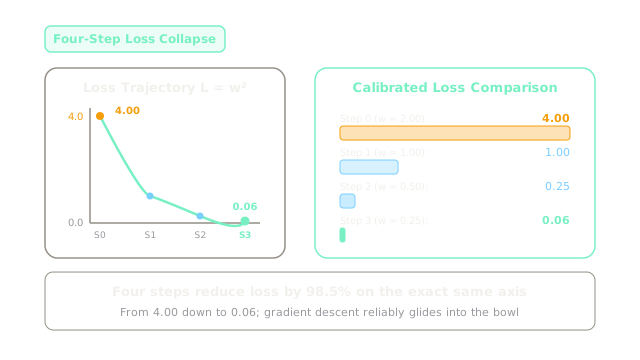
Same axis, honest comparison. Four rounds take you from w = 2 down to w = 0.25, and the loss collapses from 4.00 to 0.06. That is the payoff for trusting the slope.
Choose Your Step
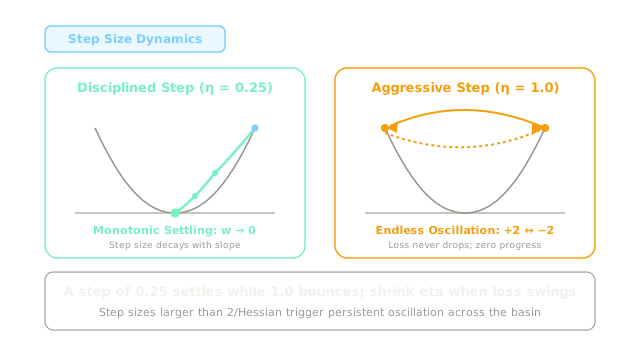
Size the step wrong and the story changes. With eta at 1.0 you bounce between 2 and minus 2 forever. So start near 0.25, and shrink eta whenever the loss swings instead of falling.
Where It Breaks
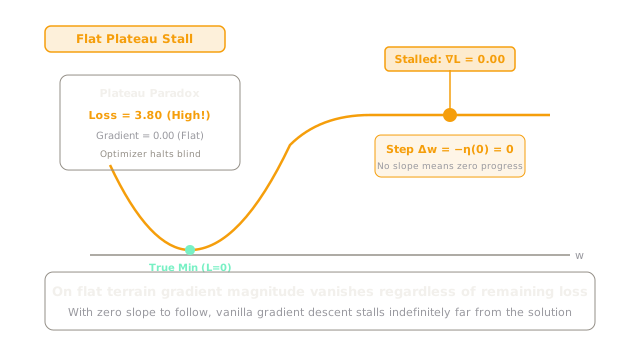
Flat ground reads the same as the bottom. On a plateau the slope is about 0, your step becomes eta times nothing, and you stall far from the true low. No alarm sounds; you just stop.
The Quick Version
- You stand on a loss surface with no map.
- The gradient arrow always points uphill.
- Step against it: w minus eta times slope.
- Steps shrink as the slope flattens.
- Four steps cut loss from 4.00 to 0.06.
- Shrink eta when the loss swings.
- Flat plateaus stall you far from the bottom.